Dodge Challenger
REAR TAILLIGHT REMOVAL
|
Disconnect and isolate the battery negative cable. |
|
2. |
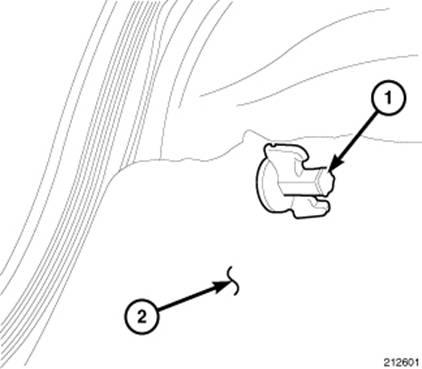
From inside the trunk, remove the wing nut (1)
|
|
Remove the remaining wing nut (1). |

|
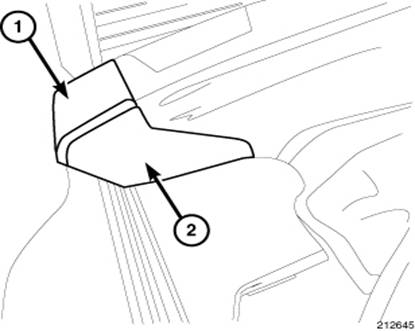
Remove the upper fascia trim cover (2) from the rear fascia (1). |
|
|
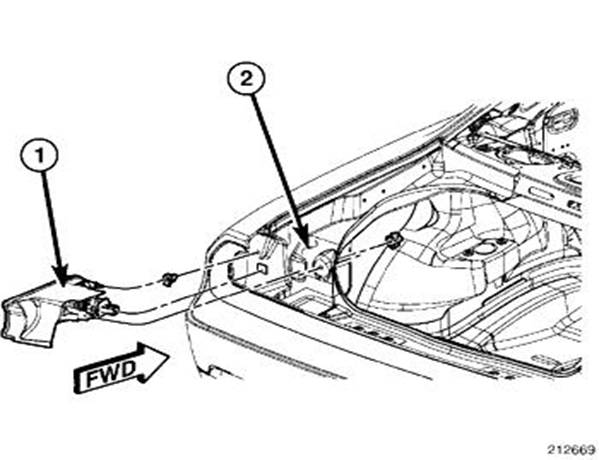
Pull the tail lamp unit (1) straight out of the rear of the
quarter trim panel (2) |
Assembly
is in reverse order!
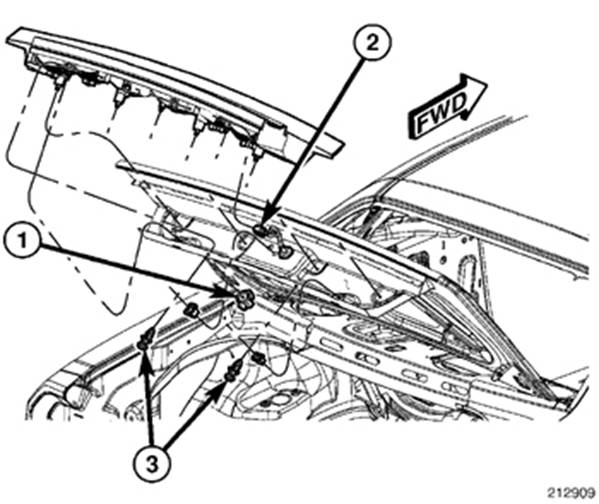
REAR CENTER TAILLIGHT SECTION
|
1.
Disconnect and isolate the negative
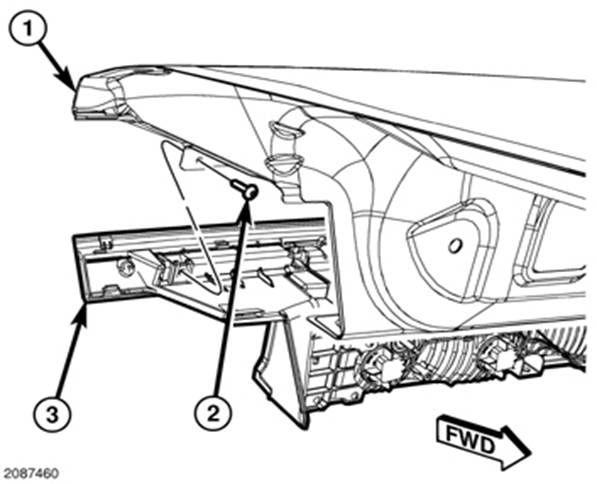
battery cable 2. Remove the two screws (2) that secure the outboard ends of the
center tail lamp unit (3) to the deck lid (1). |
|
|
|
|
Remove the four
wing nuts (1) from the back side of the trunk lid. |
|
4. |
Remove the two push
pin retainers (3). from the bottom of the center tail lamp unit. |
|
5. |
Carefully pull the center
tail lamp unit away from the trunk lid and disconnect the electrical
connector (2). |
|
|
|
Assembly
is in reverse order!
Need a Video?
For those who like to
watch "How To" video's , there are some on YouTube that you can watch
that will show you how to remove the
center section and/or the end sections (Brake/turn Signals) and what tools they
are using.
Remove Challenger Taillight
Sections
If you have a sub-woofer
installed, this video link below will show how to remove this and remove the
driver side rear lamp as well as
other sections of the rear tail light assembly.
This is for the Drake rear sequential lighting system install and shows
how to disassemble
as well as assemble the rear lighting sections.
Taillight Removal and
Assembly

Return
to Top Challenger Tips'n Tricks!
.